Building your own home server, part #4
This blog is part of the 4 posts long series "Build your own home server (2015)":
- Building your own home server, part #1 (January 19, 2015)
- Building your own home server, part #2 (January 21, 2015)
- Building your own home server, part #3 (January 23, 2015)
- Building your own home server, part #4 (January 25, 2015)
Finishing touches
The last thing that remains to be done is to hook up the UPS with the server so it shuts down once power is low. Fortunately, there’s already a package which does this for us, called apcupsd. You can fetch it using:
$ apt-get install apcupsd apcupsd-cgi
It’s needs a bit of configuration to work with our UPS. Before you continue, make sure you have the USB cable connected to the server. First of all, you have to open the configuration and set the device type:
$ nano /etc/apcupsd/apcupsd.conf
Find the lines which contain UPSTYPE and DEVICE and change them to:
UPSTYPE usb
DEVICE
Now we need to write a configuration file so the daemon knows it’s configure. Edit /etc/default/apcupsd and set
ISCONFIGURED=yes
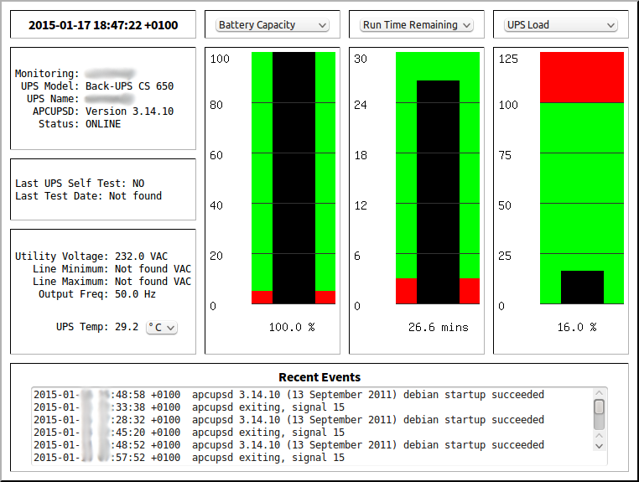
You can restart it now using service apcupsd restart. One nice thing about the APC UPS daemon is that it also comes with a web-interface:

We’ll use the Apache 2 web server to host the interface. This requires us to install the server, map the cgi-bin directory and then enable the CGI module. The following few commands will accomplish this:
$ apt-get install apache2
$ cat ScriptAlias /cgi-bin/ /usr/lib/cgi-bin/ >> /etc/apache2/apache2.conf
$ a2enmod cgi
$ sudo service apache2 restart
You can now navigate to the IP address of your server to the /cgi-bin/apcupsd/multimon.cgi page and get the UPS overview. There’s only one thing left to do, which is to pull the power cable to check that the UPS does actually work. The apcupsd documentation has exactly the right words for this step:
To begin the test, pull the power plug from the UPS. The first time that you do this, psychologically it won’t be easy, but after you have pulled the plug a few times, you may even come to enjoy it.
I couldn’t have said it better myself.
Power usage & performance

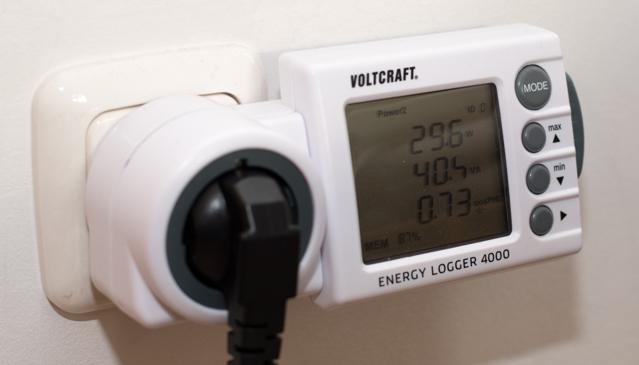
I’ve measured the total system power usage both with the UPS and without. Idle usage of the server alone is around 28-29W, and goes up to 34W under full load – that is, all CPUs busy and maximum usage of the disk drives. With the UPS, you can expect around 33W while idle, and 36W or so under load. Keep in mind that 99% of the time, the server will be in fact idle.
Performance wise, I get sustained write rates onto the ZFS filesystem of roughly 150 MiB/s. This includes the time to generate the checksums and writes to both disk drives. You can test this easily by writing a zero-byte file:
$ dd if=/dev/zero of=/tank/dummyfile count=8192 bs=1048576
8192+0 records in
8192+0 records out
8589934592 bytes (8.6 GB) copied, 52.9725 s, 162 MB/s
Over network, I could easily reach more than 900 MBit over my home gigabit ethernet, which does not achieve exactly 1000 MBit even in the best circumstances. I assume that with a proper, server-grade switch you’ll be able to achieve close to 1000 MBit – if you have some numbers, please get in touch!
Closing remarks
That’s all folks, you have now a full-blown Linux server at home at your disposal. There’s no end to the things you can run on it, ranging from DLNA servers like MediaTomb over databases like PostgreSQL to virtual machine hosts using KVM. You’ll probably want to set up a backup solution as well, which can be easily done with ZFS as you can backup a snapshot while the file system is being mutated by the users. I hope you enjoyed this guide, and if you have any questions, comment or drop me a line!
The server described here has found its new location at my friends home so I can’t run additional tests on it. The deployment was very simple, I plugged in the cable and it immediately showed up on the network. Interestingly, after swapping the network cable to the monitoring port and back, I was also able to access the management console even though the network was plugged in into the “client” port. Otherwise, nothing special was needed to get it working in a different network.
